Menu
Move Data from SQL Server to Azure Blob Storage with Incremental Changes – Part 1
By Ginger Daniel | Azure
By Ginger Daniel | Azure
One of many options for Reporting and Power BI is to use Azure Blob Storage to access source data. Most of the documentation available online demonstrates moving data from SQL Server to an Azure Database, however my client needed data to land in Azure Blob Storage as a csv file, and needed incremental changes to be uploaded daily as well. This article will outline the steps needed to upload the full table, and then the subsequent data changes.
The general steps for uploading initial data from tables are:
The general steps for uploading incremental changes to the table are:
Create an Azure Account
If you don’t have an Azure Account already, you can sign up for a Free Trial account here https://tinyurl.com/yyy2utmg . This will give you all the features necessary to perform the tasks above. I highly recommend practicing these steps in a non-production environment before deploying for your organization.
In order for you to store files in Azure, you must create an Azure Storage Account. Your storage account will belong to a Resource Group which is a logical container in Azure. And you need to create a Container that will hold your files. It is somewhat similar to a Windows file structure hierarchy – you are creating ‘folders’ and ‘subfolders’. Setting up a storage account is fairly simple, and step by step instructions can be found here https://docs.microsoft.com/en-us/azure/storage/common/storage-quickstart-create-account?tabs=azure-portal.
Create an Azure Data Factory
Once you have your basic Azure account and storage account set up, you will need to create an Azure Data Factory (ADF). Azure Data Factory is a data integration service that allows you to create workflows to move and transform data from one place to another. In order to copy data from an on-premises location to the cloud, ADF needs to connect the sources using a service called Azure Integration Runtime. The self-hosted integration runtime is the component that copies data from SQL Server on your machine to Azure Blob storage.
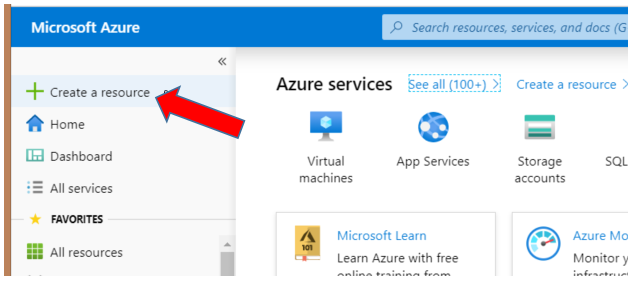
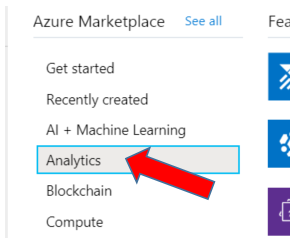
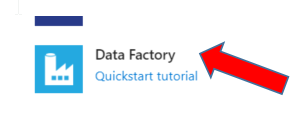
To set this up, click on Create a Resource, then select Analytics, and choose Data Factory as shown below:
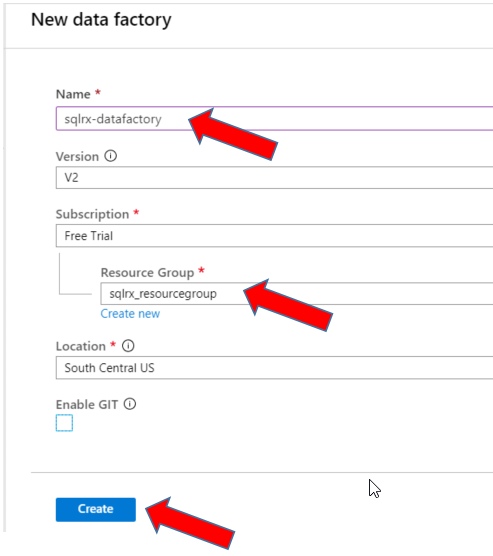
Type in a name for your data factory that makes sense for you. Note, you can have more than one data factory that can be set up to perform other tasks, so take care in your naming conventions. Next select the resource group you established when you created your Azure account. Select the location desired, and hit Create to create your data factory.
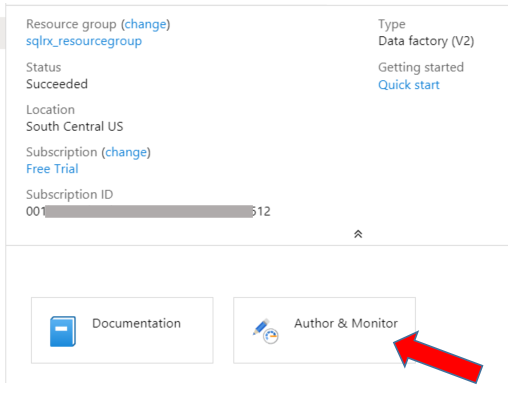
Go to the resource to see the properties of your ADF just created. Click on the Author & Monitor button, which will open ADF in a new browser window.
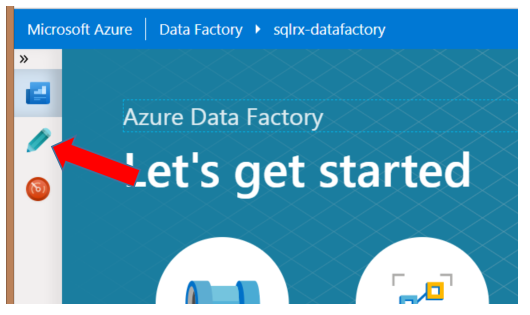
Once in the new ADF browser window, select the Author button on the left side of the screen to get started as shown below:
Install Azure Integration Runtime
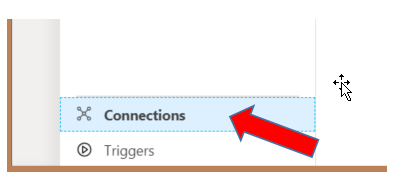
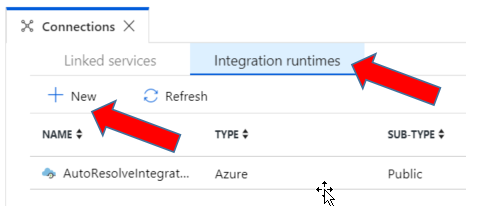
Now that you have created an Azure Data Factory and are in the Author mode, select the Connections option at the bottom left of the screen. Go to the Integration Runtimes tab and select + New to set up a self-hosted Integration Runtime service.
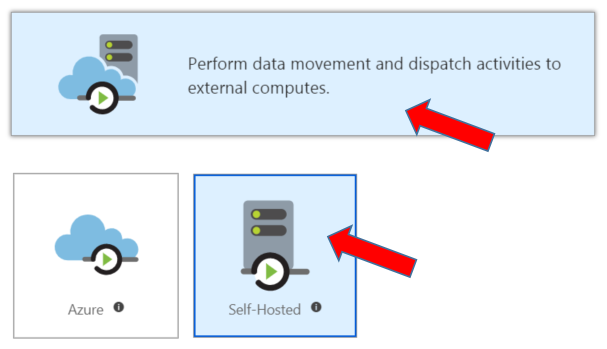
Select Perform data movement and dispatch activities to external computes button. Hit Continue and select Self-Hosted.
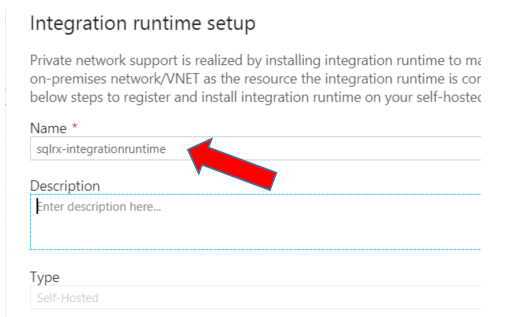
Choose a name for your integration runtime service, and press ‘Create’.
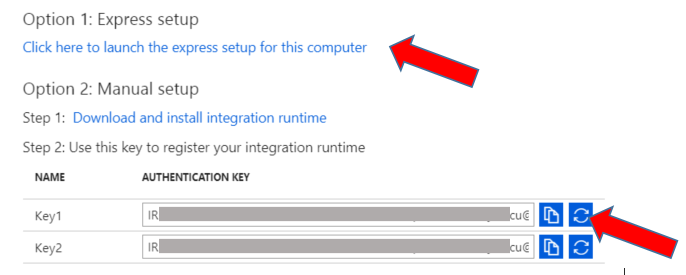
Launch the express setup for this computer option. As you go through the setup wizard, you will need to copy/paste the Key1 authentication key to register the program.
Click here https://community.dynamics.com/gp/b/gpmarianogomez/posts/installing-microsoft-azure-integration-runtime for instructions on how to go through integration runtime setup wizard.
Create Linked Services
The next step is to create Linked Services which link your data stores and compute services to the data factory. You will create two linked services, one for a communication link between your on-premise SQL server and your data factory. The other for a communication link between your data factory and your Azure Blob Storage.
Create Source Linked Service (from your SQL Server)
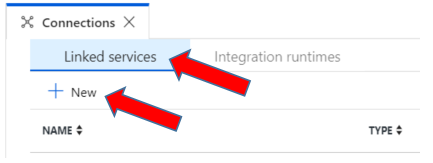
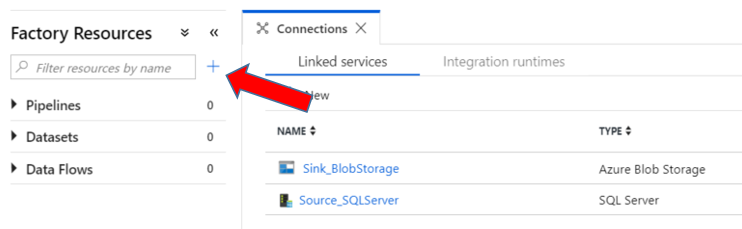
With the Connections window still open, click on the Linked Services tab and + New to create a new linked service.
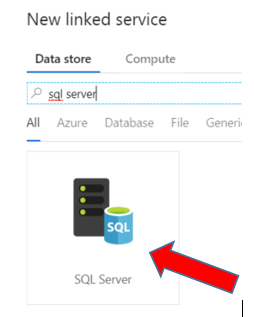
In the Search bar, search for and select SQL Server
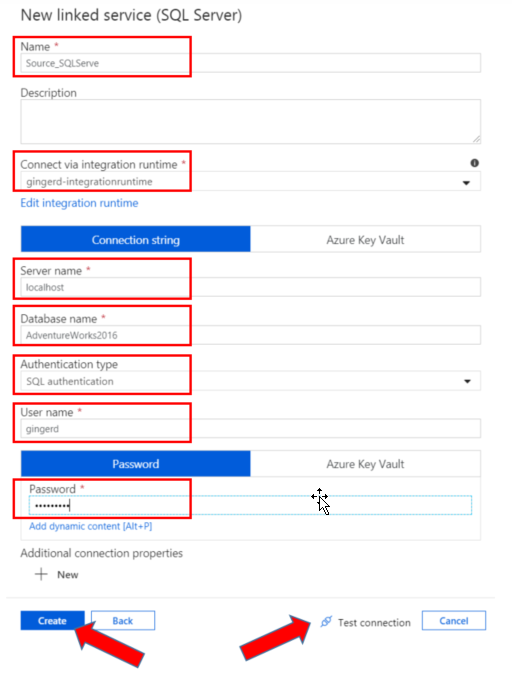
Choose a name for your linked service, the integration runtime you have created, server name, database name, and authentication to the SQL server. I have named my linked service with a descriptive name to eliminate any later confusion. I used localhost as my server name, but you can name a specific server if desired. I also used SQL authentication, but you have the choice to use Windows authentication as well. After populating the necessary fields, push Test Connection to make sure there are no errors, and then push Create to create the linked service.
Create Sink (destination) Linked Service (to Azure Blob Storage)
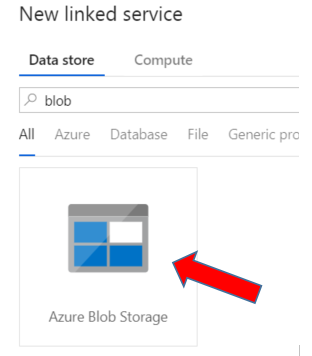
Now create another Linked Service to establish a connection between your data factory and your Azure Blob Storage. Click on the + New button and type Blob in the search bar. Select the Azure Blob Storage icon. Go through the same steps and choose a descriptive name that makes sense. I have named mine Sink_BlobStorage. Select the integration runtime service you set up earlier, select your Azure subscription account, and your Blob storage account name you previously created. Test the connection, and hit Create.

You now have both linked services created that will connect your data sources. Next step is to create your Datasets.
Create Datasets Datasets represent your source data and your destination data. Since we will be moving data from an on-premise SQL server to an Azure Blob Storage account, we need to define two separate datasets.
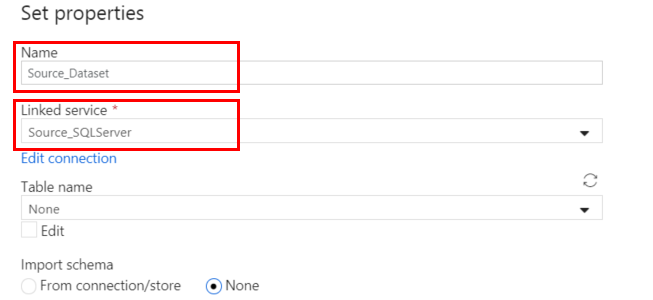
Create a Source Dataset (from SQL Server) Click on the + sign on the left of the screen and select Dataset. Search for and select SQL Server to create a dataset for your source data. Provide a descriptive Name for the dataset and select the Source linked server you created earlier. Do not select a Table name yet, as we are going to upload multiple tables at once using a Copy Activity when we create a Pipeline later.
Create a Sink Dataset (to Azure Blob Storage)
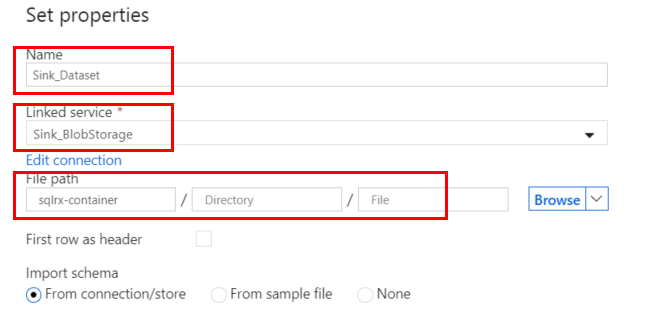
Click on the + sign in the left pane of the screen again to create another Dataset. Search for and select Azure Blob Storage to create the dataset for your sink, or destination data. My client wants the data from the SQL tables to be stored as comma separated (csv) files, so I will choose DelimitedText as the format for my data.

Choose a descriptive Name for the dataset, and select the Linked Service you created for your blob storage connection. You should have already created a Container in your storage account. My existing container is named sqlrx-container, however I want to create a subfolder inside my container. We will do this on the next step.
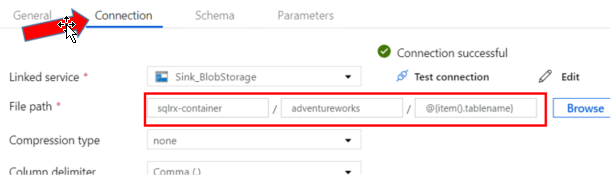
In the Connection tab of the dataset properties, I will specify the Directory (or folder) I want to include in my Container. This subfolder will be created as soon as the first file is imported into the storage account.
I named my Directory folder adventureworks, because I am importing tables from the AdventureWorks database. You can name your folders whatever makes sense for your purposes.
In the File Name box, enter: @{item().tablename}. This will assign the names of your csv files to be the names of your tables, and will be used again in the Pipeline Copy Activity we will create later. You can have multiple containers, and multiple folders within those containers. Be sure to organize and name your storage hierarchy in a well thought out and logical way.
Create a Pipeline
The Pipeline in Azure Data Factory specifies a workflow of activities. We are going to use the pipeline to iterate through a list of table names that we want to import, and for each table in our list, we will copy the data from SQL Server to Azure Blob Storage.
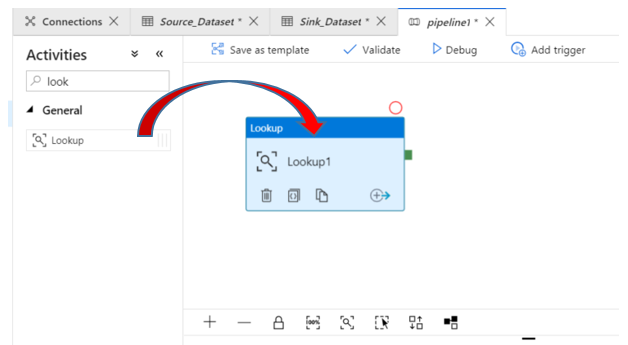
Add Lookup Activity In the left pane of the screen click the + sign to add a Pipeline. Under Activities, search for Lookup, and drag the Lookup icon to the blank area on the right side of the screen:
Rename the pipeline to FullCopy_pipeline, or something descriptive.
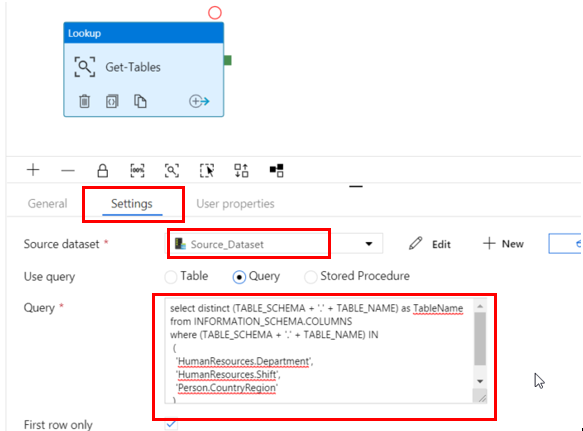
Rename the Lookup activity to Get-Tables.
Select the Settings tab of the Lookup activity properties. Choose the Source dataset you created, and select the Query button. Enter the following query to select the table names needed from your database.
select distinct (TABLE_SCHEMA + '.' + TABLE_NAME) as tablename
from INFORMATION_SCHEMA.COLUMNS
where (TABLE_SCHEMA + '.' + TABLE_NAME) IN
 (
  'HumanResources.Department',
  'HumanResources.Shift',
  'Person.CountryRegion'
 )
Add ForEach Activity
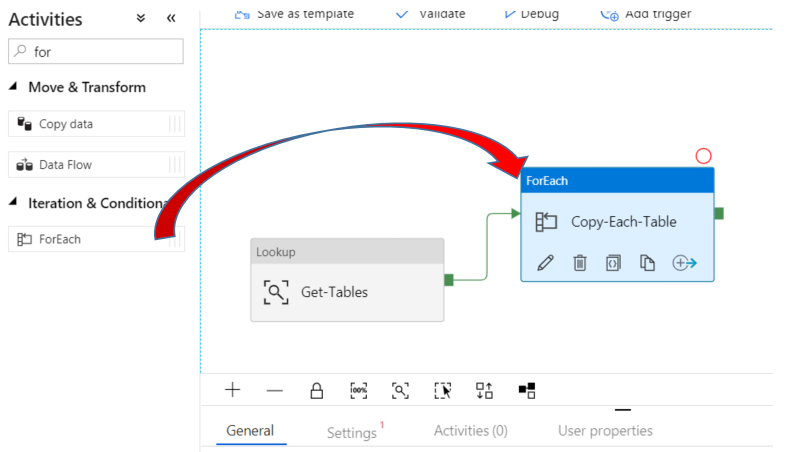
Next, in the Activities section, search for a drag over the ForEach activity.
Rename it Copy-Each-Table. Drag the green connector from the Lookup activity to the ForEach activity to connect the activities
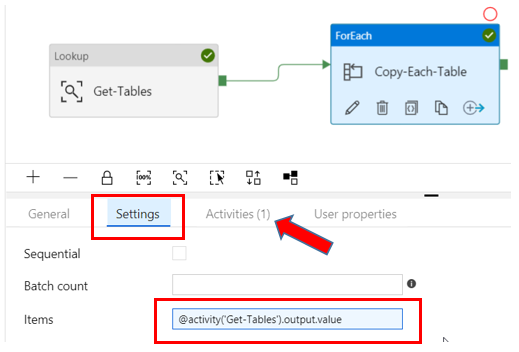
In the Settings tab of the ForEach activity properties, type this in the Items box:@activity(‘Get-Tables’).output.value
Add Copy Data Activity
Click on the Activities tab of the ForEach activity properties. Select Add Activity. In the Activities section search for the Copy Data activity and drag the icon to the right pane of the screen. Change the name to Copy-Tables.

Click on the Source tab of the Copy data activity properties.
Select the Source dataset you created earlier. Select the Query button, and enter the following for the query:select * from @{item().tablename}

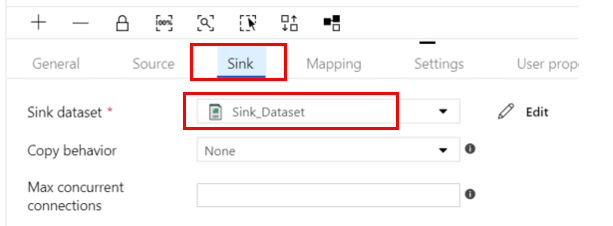
Go to the Sink tab of the Copy data activity properties, and select the Sink dataset you created earlier.
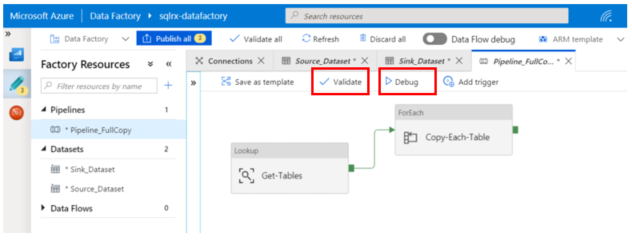
Debug & Publish After creating your Pipeline, you can push the Validate link to ensure your pipeline is validated and no errors are found. Now we want to push the Debug link to start the workflow and move the data from your SQL Server database to the Azure Blob Storage. This will trigger a run of the current pipeline, and it will create the directory/subfolder you named earlier, with the files names for each table.
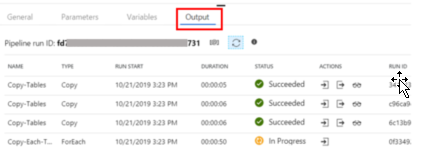
You can observe the progress of the pipeline workflow as it is processing by clicking on the Output tab in the pipeline properties.
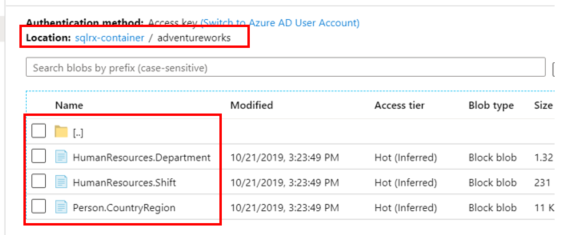
After the Debugging process has completed, go to your Blob Storage account and check to make sure all files have landed in the correct container and directory.
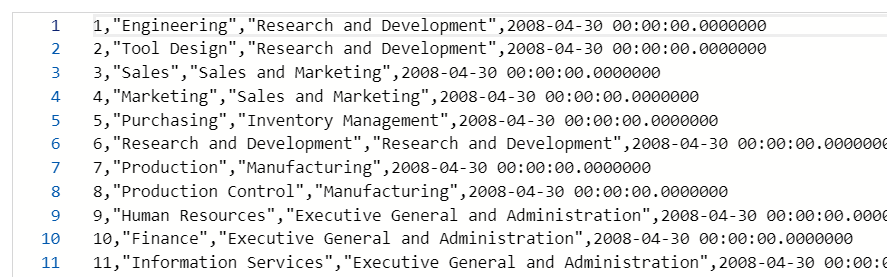
If you click on the ellipse to the right of each file, you can ‘View/Edit Blob’ and see the contents of each file. Since I have uploaded the SQL Tables as csv files, each file is in a flat, comma delimited format as shown:
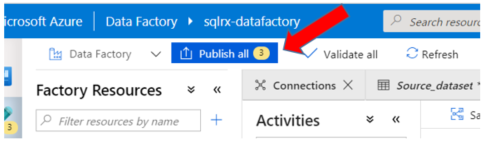
Before signing out of the Azure Data Factory, make sure to Publish All to save everything you have just created.
Purge Old Files from Azure Storage Account Container
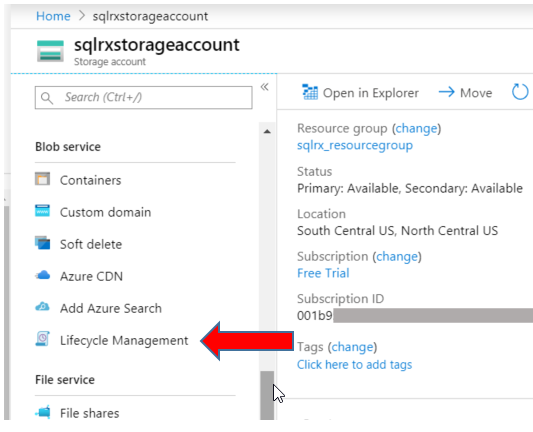
Assuming you don’t want to keep the uploaded files in your Blob storage forever, you can use the Lifecycle Management Blob service to delete old files according to a retention period you set. From your Home screen or Dashboard, go to your Blob Storage Account. Scroll down to Blob service and select Lifecycle Management.*If you have a General Purpose (GPv1) type of storage account, the Lifecycle Management service is not available. Lifecycle management policy is available with General Purpose v2 (GPv2) accounts, Blob storage accounts, and Premium Block Blob storage accounts.
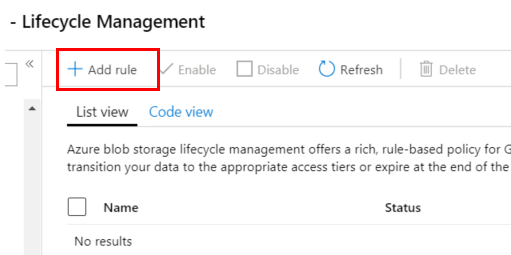
Click on + Add rule to specify your data’s lifecycle and retention period.
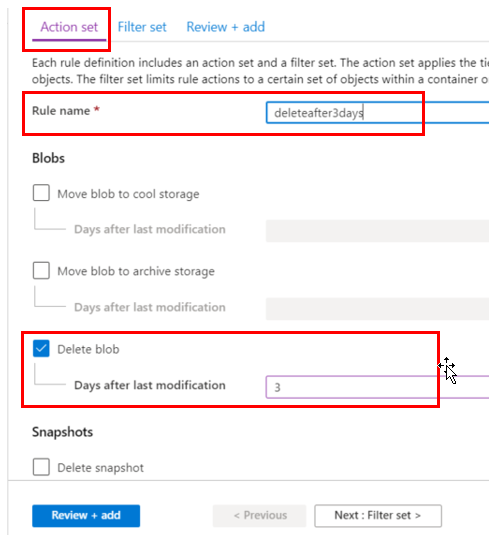
Name the rule something descriptive, and select the option desired for your files
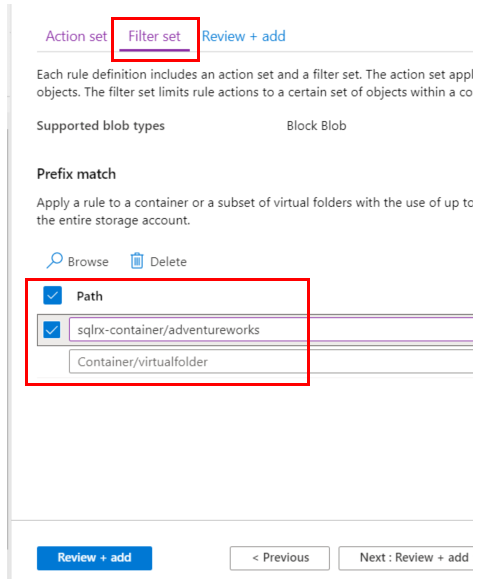
In the Filter set tab, specify the container/folder you want the lifecycle rule to be applied to. Push Review + add, and then Add to activate and save the rule.
Conclusion
Part 1 of this article demonstrates how to upload multiple tables from an on-premise SQL Server to an Azure Blob Storage account as csv files. I covered these basic steps to get data from one place to the other using Azure Data Factory, however there are many other alternative ways to accomplish this, and many details in these steps that were not covered. For a deep-dive into the details you can start here https://docs.microsoft.com/en-us/azure/data-factory/introduction, and https://docs.microsoft.com/en-us/azure/data-factory/quickstart-create-data-factory-portal#create-a-pipeline.
In part 2, I will demonstrate how to upload the incremental data changes in your SQL Server database to Azure Blob Storage.
For more information about blog posts, concepts and definitions, further explanations, or questions you may have…please contact us at SQLRx@sqlrx.com. We will be happy to help! Leave a comment and feel free to track back to us. Visit us at www.sqlrx.com!