Menu
Steps for Installing AlwaysOn Availability Groups – SQL 2019
By Ginger Daniel | Always On
With SQL Server 2012 Microsoft introduced the AlwaysOn Availability Group feature, and since then many changes and improvements have been made. This article is an update to our previous article https://www.sqlrx.com/steps-for-installing-sql-server-alwayson-availability-groups/ , and will cover the prerequisites and steps for installing AlwaysOn in your SQL Server 2019 environment.
Prerequisites
Before implementing your AlwaysOn Availability Group (AG), make sure you have everything in your environment ready to go. There are several prerequisites that need to be addressed to ensure a successful deployment.
Windows
SQL Server
Network
Databases
Databases in an AlwaysOn group must be:
For a complete and detailed explanation of prerequisites, go here: https://docs.microsoft.com/en-us/sql/database-engine/availability-groups/windows/prereqs-restrictions-recommendations-always-on-availability?view=sql-server-ver15
Add Windows Failover Cluster (WSFC) to each replica
Install WSFC
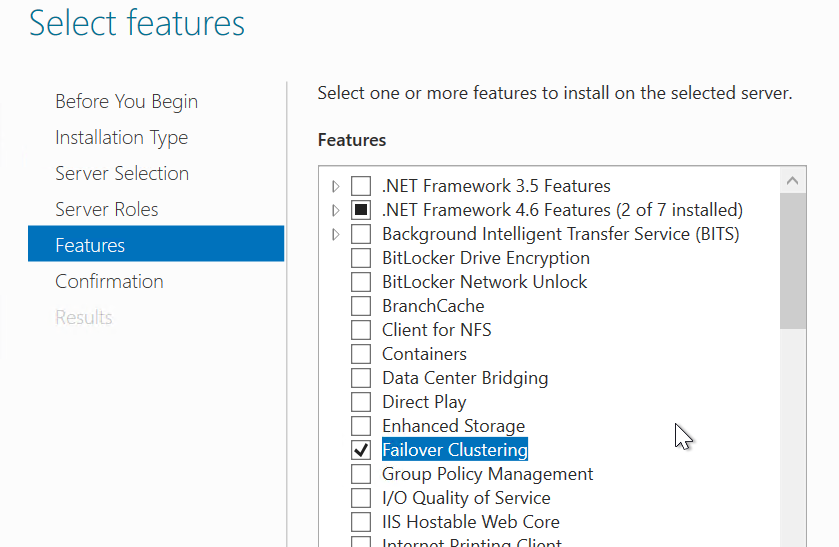
On each replica, open Server Manager > click Add Roles & Features > select Add Failover Clustering > click Install
Proceed through the wizard, and when you get to the Select Features page, select the Failover Clustering checkbox.
If you do not already have .NET Framework 3.5.1 or greater installed on your server, select that checkbox as well to install. (If you do need to install the .NET Framework, you will need to reboot the server after installing).
Proceed next through the wizard and click Install to finish the wizard. You will need to do this on every replica in your AlwaysOn group.
Configure WSFC on primary replica
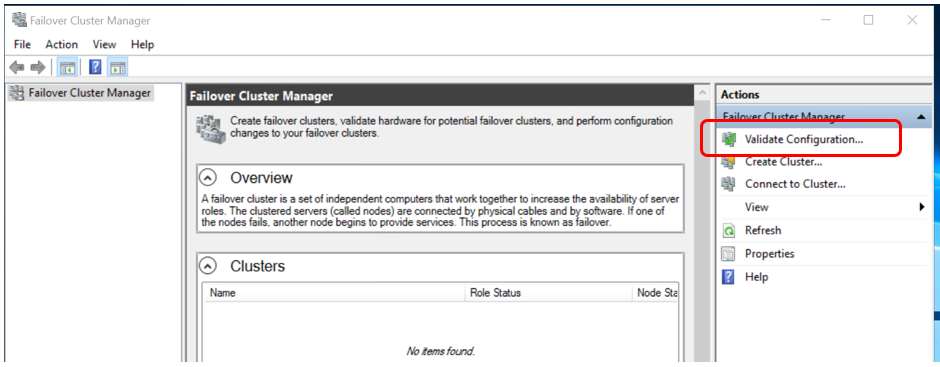
From Administrative Tools, open Failover Cluster Manager and click on Validate Configuration
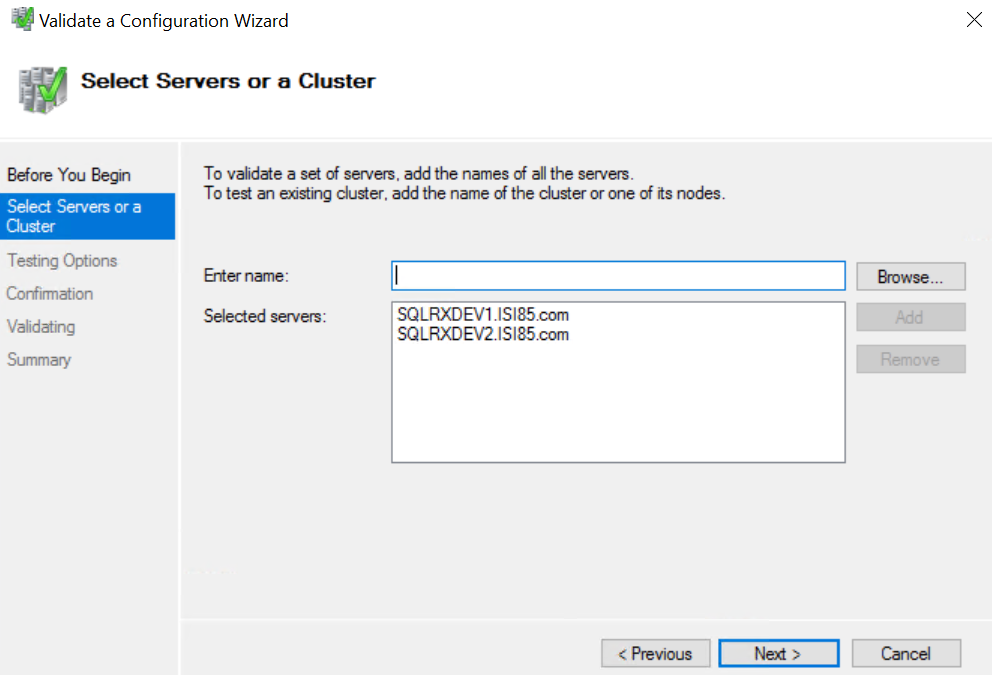
Add the names of all the SQL Servers you want to configure as replicas in your AlwaysOn group.
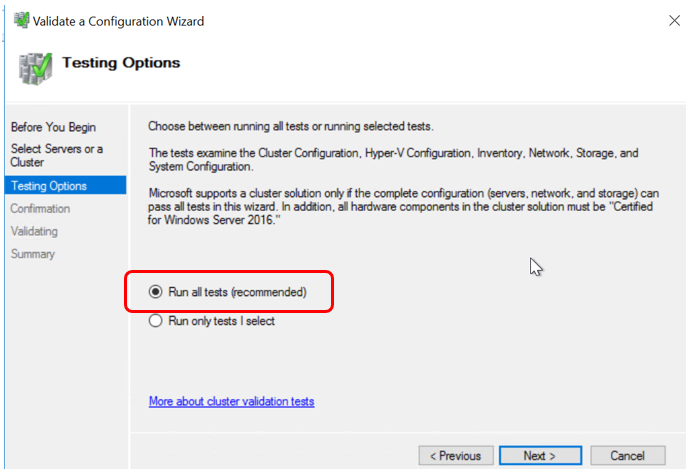
On the Testing Options page, click Run all tests (recommended). It is normal to see some warning messages. Make sure to review the warnings and correct anything necessary.
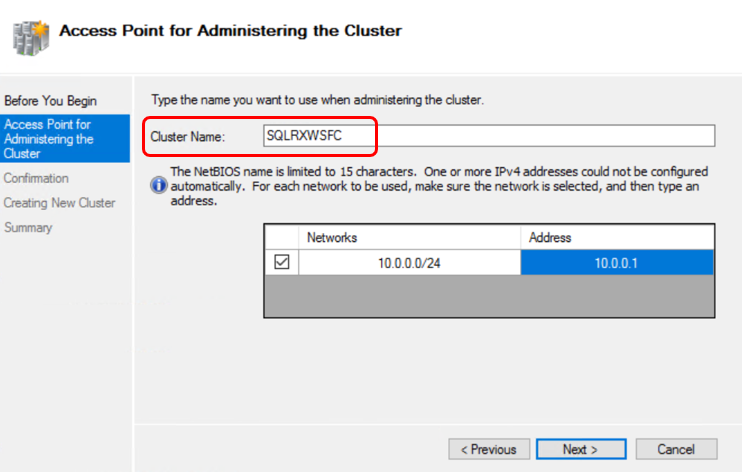
After the validation and summary is complete, the Create Cluster Wizard will open.
In the Access Point for Administering the Cluster dialog box, enter the virtual cluster name (not the server or instance name), and the virtual IP address of your cluster.
Proceed next through the wizard, and your cluster will be created. The secondary nodes will be added to the cluster, and your cluster should now show up on all replicas (through Failover Cluster Manager). You do not have to go through these steps on the other replicas…you’re all done with setting up the cluster.
Install AlwaysOn 2019
Configure SQL Server
Assuming you are installing a traditional AlwaysOn Availability Group (and not a Basic Availability Group), make sure you have installed Enterprise edition of SQL Server onto each replica, and install it as stand-alone instances.
On each replica, open the SQL Server Configuration Manager.
Right click on SQL Server Services and open the Properties dialog box. Navigate to the AlwaysOn High Availability tab and select Enable AlwaysOn Availability Groups checkbox.
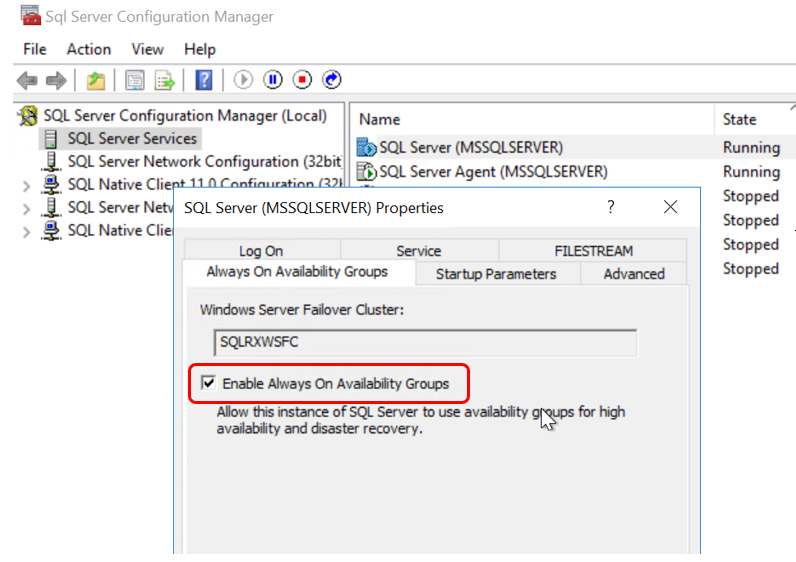
Restart the SQL Server Service after making these changes.
Do these steps on all your replicas.
Install AlwaysOn
Make sure all databases are in Full Recovery mode.
Remove these databases from any tlog backup maintenance during the installation of AlwaysOn (you can add them back later). You do not want tlog backups happening on these databases while the AlwaysOn group is being created.
Take Full & tlog backups of all databases you want added to the AlwaysOn group:
--Full Backups
BACKUP DATABASE [AdventureWorks2017] TO  DISK = N'S:\MSSQL\Backups\AdventureWorks_FullBackup.bak'
WITH NOFORMAT, NOINIT,
NAME = N'AdventureWorks2017-Full Database Backup',
SKIP, NOREWIND, NOUNLOAD, COMPRESSION,  STATS = 10, CHECKSUM
GO

--Tlog Backups
BACKUP LOG [AdventureWorks2017] TO  DISK = N'S:\MSSQL\Backups\Adventureworks_TlogBackup.trn'
WITH NOFORMAT, NOINIT,
NAME = N'AdventureWorks2017-Full Database Backup',
SKIP, NOREWIND, NOUNLOAD, COMPRESSION,  STATS = 10, CHECKSUM
GO
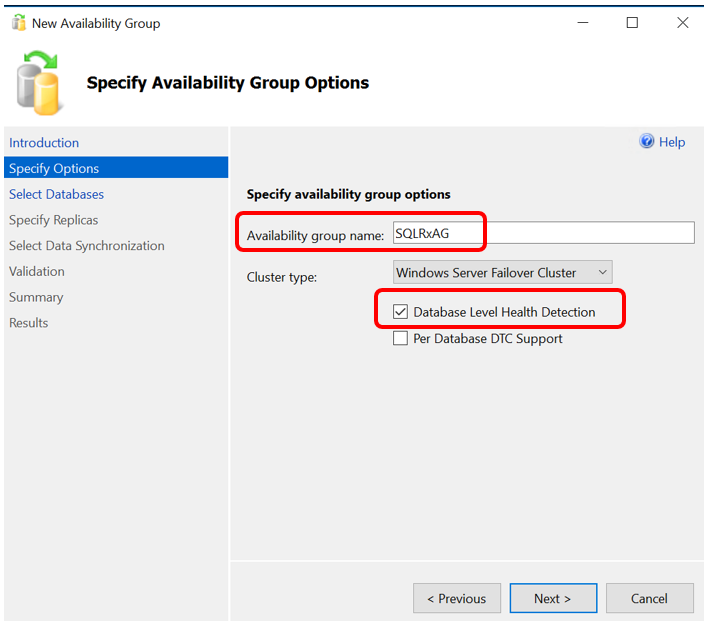
On your primary replica, open SQL Management Studio (SSMS) and expand the AlwaysOn High Availability folder. Right click on Availability Groups and select New Availability Group Wizard… to open the wizard:

First, specify your AlwaysOn group name. Name it something descriptive and unambiguous. Also select the checkbox for Database Level Health Detection. Starting in AlwaysOn 2016, failover will occur not only if the instance is in trouble, but also if one or more of your databases is in trouble. This is not a default setting however; you must specify this when creating your AlwaysOn group.
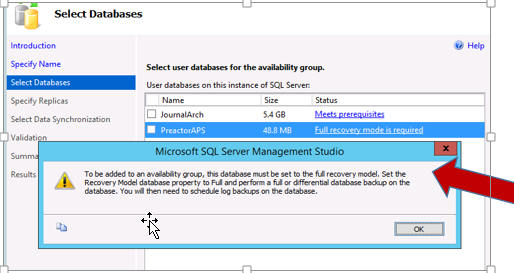
Next, you will select the databases you want to include in your AlwaysOn group. All the databases in your instance will show up in this list…you don’t have to include all of them in your group… select only the ones to be included in the AlwaysOn group.
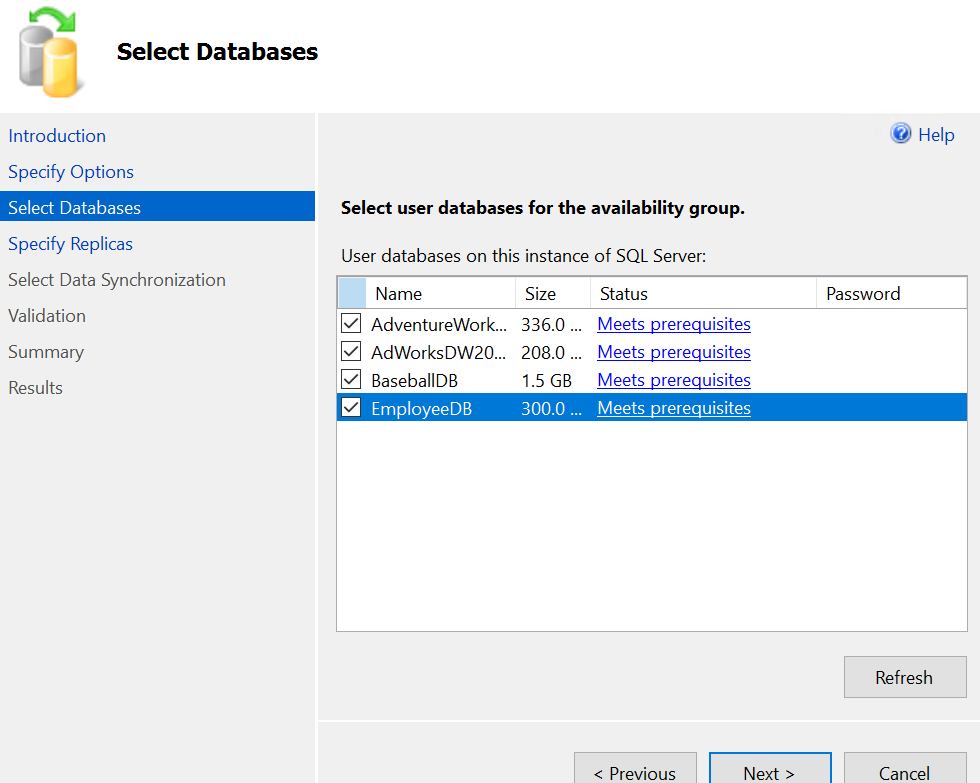
Next to each database is a blue link that signifies whether your database is ready to be included into your group or not. If the link does not say ‘Meets prerequisites’, then you can click on the link to get a more in-depth explanation of what you need to do. Correct any discrepancies, and then select the databases to include in the AlwaysOn group.
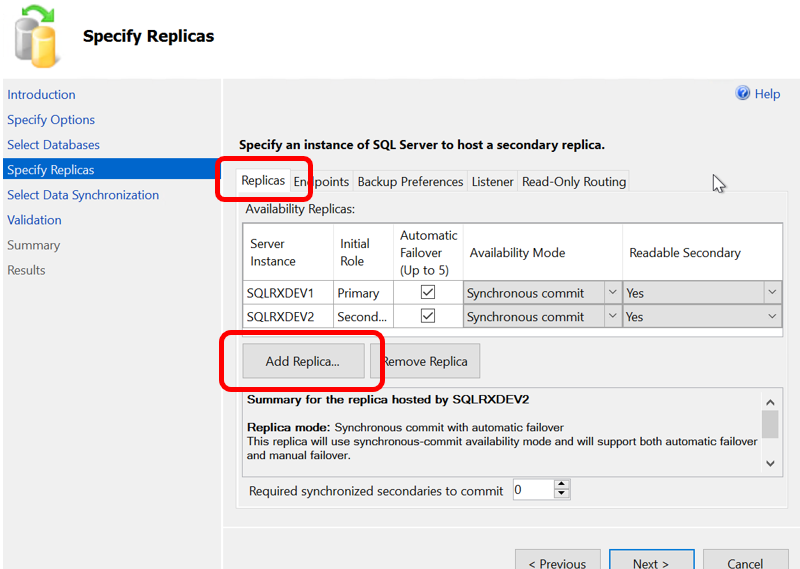
Next, is the Specify Replicas page where you will add the replicas to be included in your AlwaysOn group. Add and connect the replicas by clicking the Add Replica… button.
For each replica, you will need to specify whether you want Automatic or Manual Failover, Synchronous or Asynchronous Data Replication, and what type of Connections you will allow your end users to connect with.
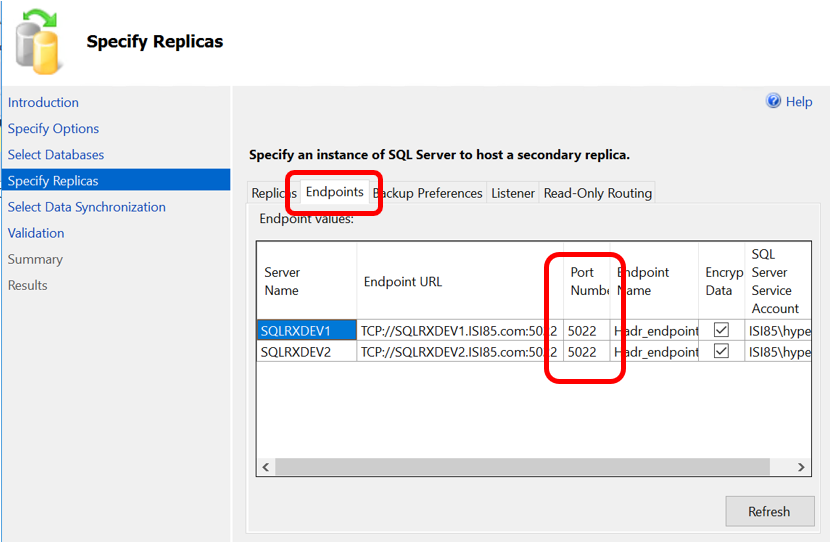
On this Specify Replicas page, there are several tabs at the top. The second tab is the Endpoints tab. On this tab verify that the port number is 5022. If you have more than one instance on your server, you might need to create another endpoint. Click here for further explanation: http://blogs.msdn.com/b/alwaysonpro/archive/2013/12/09/trouble-shoot-error.aspx
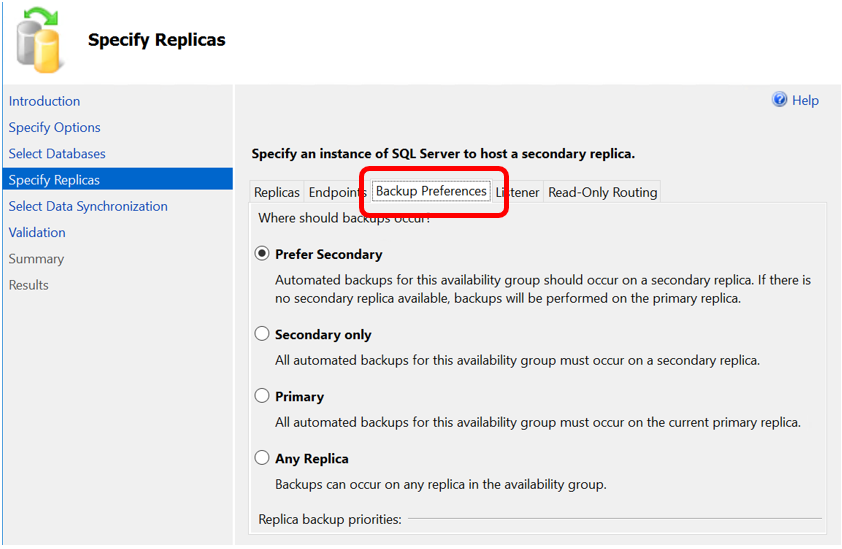
Next tab is the Backup Preferences tab. This is where you will choose where you want your backups to occur, and how you prioritize which replica will run your backups.
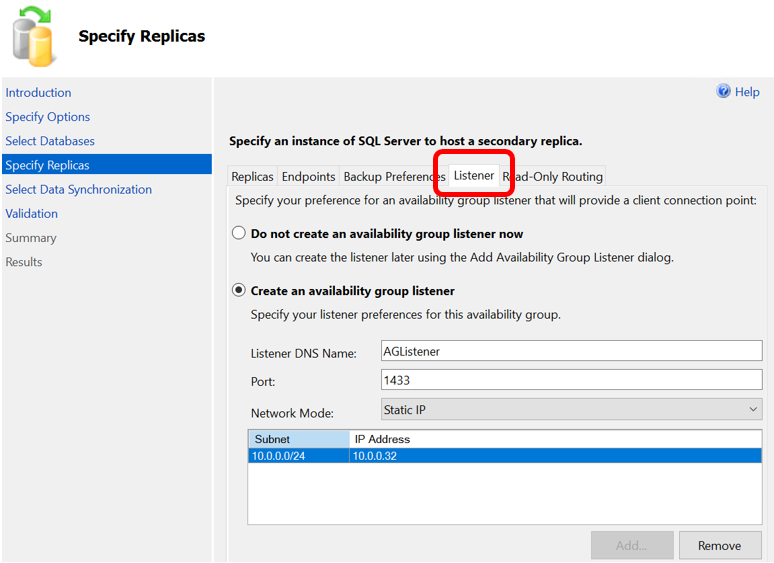
The next tab in the page is the Listener tab. Here you will select the Create an availability group listener button.
Enter the DNS name, which is the name that will be used in your application connection string.
Enter port number 1433. And enter the IP address for your listener. This should be an unused IP address on your network.
The last tab in the Specify Replicas page is Read-Only Routing. This is used when you want SQL Server to direct read-only connections to a secondary replica. This feature must have a routing URL and a read-only routing list. Within the wizard you can specify the routing URL, however you cannot specify the routing list at this point. To specify the routing list, you must open the properties of the AlwaysOn group after it has been created, or add it using TSQL or PowerShell. For more information click here https://docs.microsoft.com/en-us/sql/database-engine/availability-groups/windows/configure-read-only-access-on-an-availability-replica-sql-server?view=sql-server-ver15

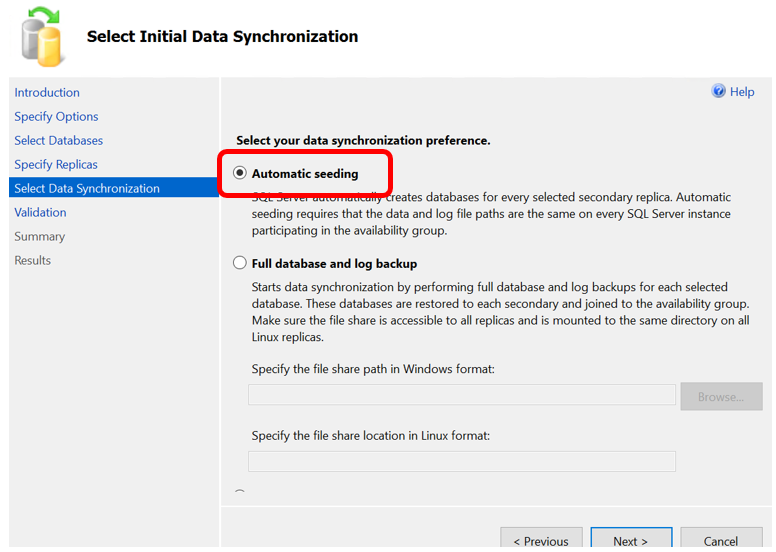
The next page in the wizard is the Select Initial Data Synchronization page. Here is where you will join your databases to the AlwaysOn group. Select the Automatic seeding option for SQL to automatically create the databases on your secondary replicas. Make sure your data and log file paths are identical on all replicas.
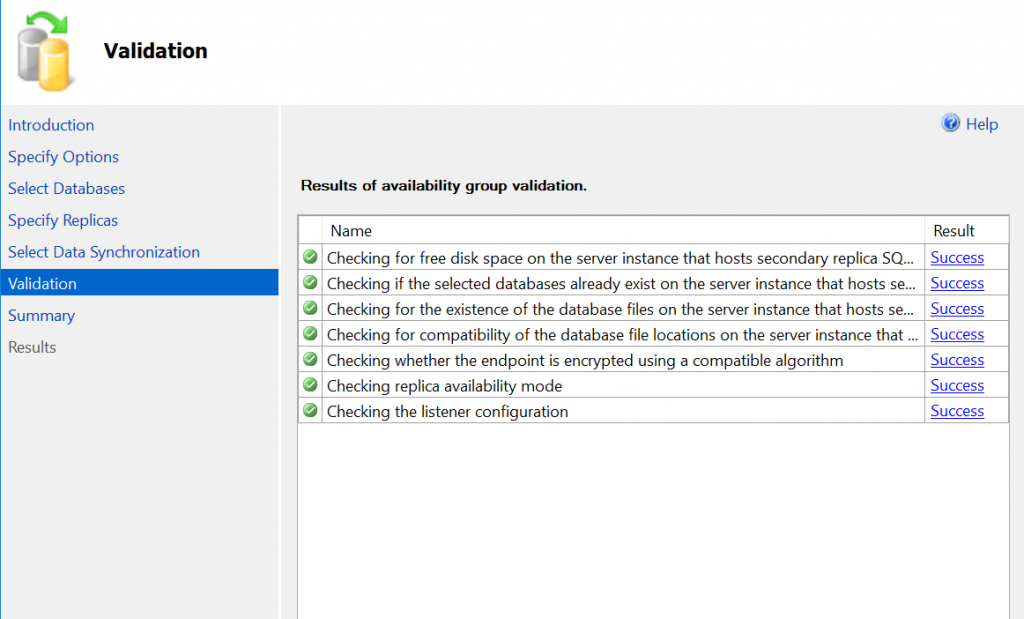
Next, ensure that your Validation checks return successful results. If you get any errors, you need to stop and correct these before proceeding.
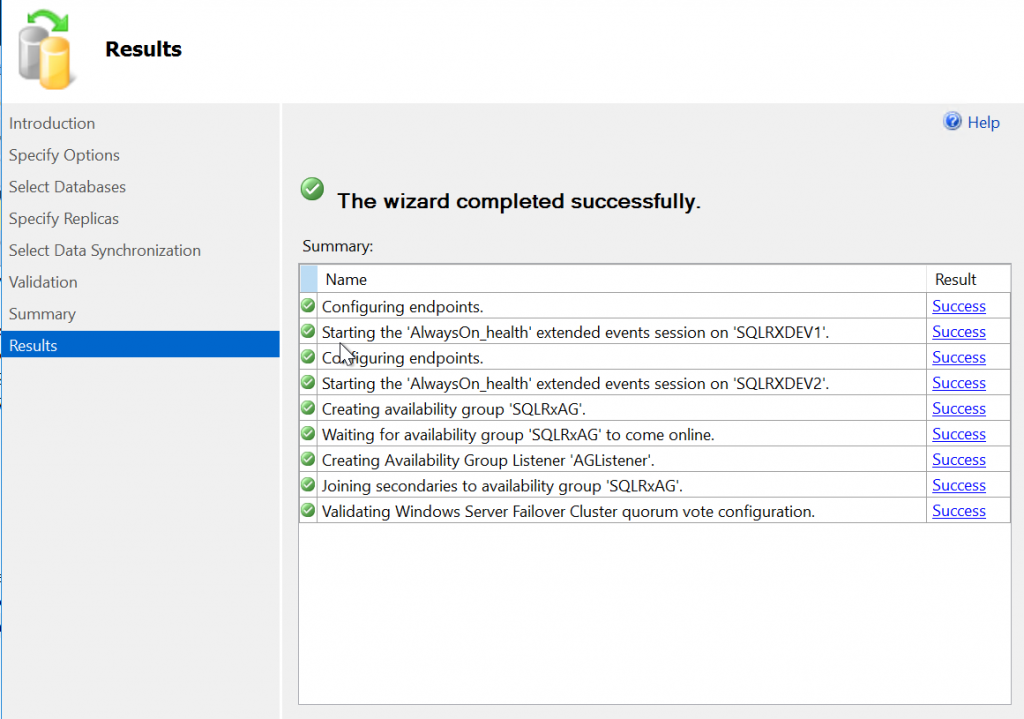
In the Summary page, verify that all your configuration settings are correct, and click Finish. The Results page will show the progress of the installation. Verify that all tasks have completed successfully.
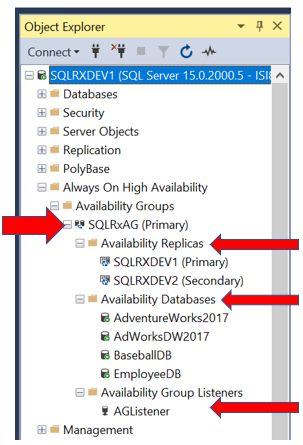
After the results are complete, and everything has finished successfully, you can now see the AlwaysOn Availability Group created in SSMS:
The Availability Group Name: SQLRx_AG
All the Replicas, and whether they are primary or secondary
All the Databases included in the AlwaysOn group
And the Listener created for the group. This AlwaysOn Group will also be visible on all the secondary replicas as well.
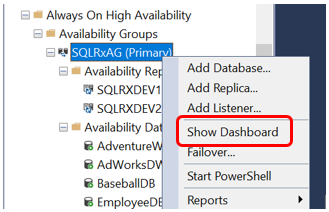
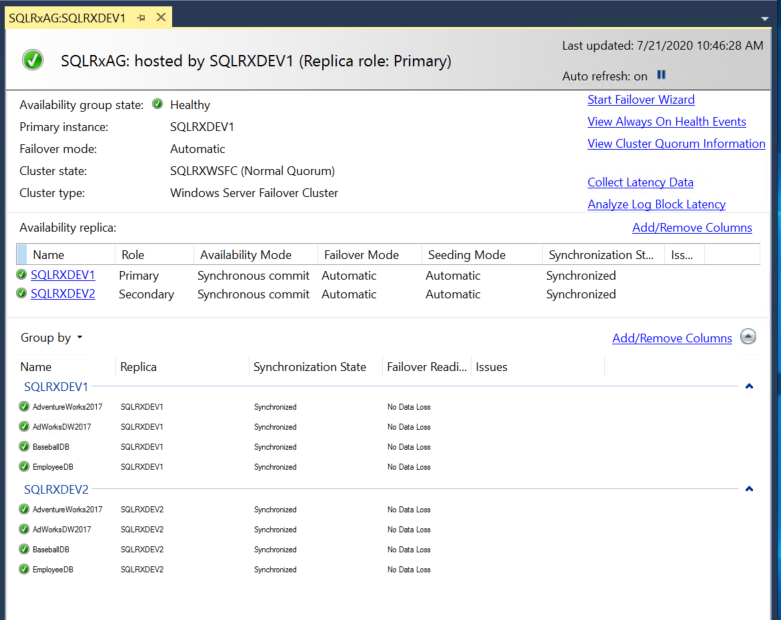
SQL Management Studio (SSMS) provides a Dashboard tool to monitor the current state and health of your Availability Groups. Simply right click on the AlwaysOn group name and select Show Dashboard to get an overview of the state of your AlwaysOn group.
In the Dashboard, you can see which replicas are primary/secondary, the databases in the AG, the failover mode, and if they are online and connected to the AG. If there are any issues, a link will appear in the Issues column which will help you troubleshoot.
For more information about blog posts, concepts and definitions, further explanations, or questions you may have…please contact us at SQLRx@sqlrx.com. We will be happy to help! Leave a comment and feel free to track back to us. Visit us at www.sqlrx.com
Session expired
Please log in again. The login page will open in a new tab. After logging in you can close it and return to this page.
[…] Ginger Daniel takes us through the process of setting up an Always On Availability Group in SQL Serv…: […]
[…] post Steps for Installing AlwaysOn Availability Groups – SQL 2019 appeared first on […]